If you decide to manually update the application on your Android mobile and you get the message “update failed”, don’t be mad, this is a very common error, which is often “submit” on Android phones.
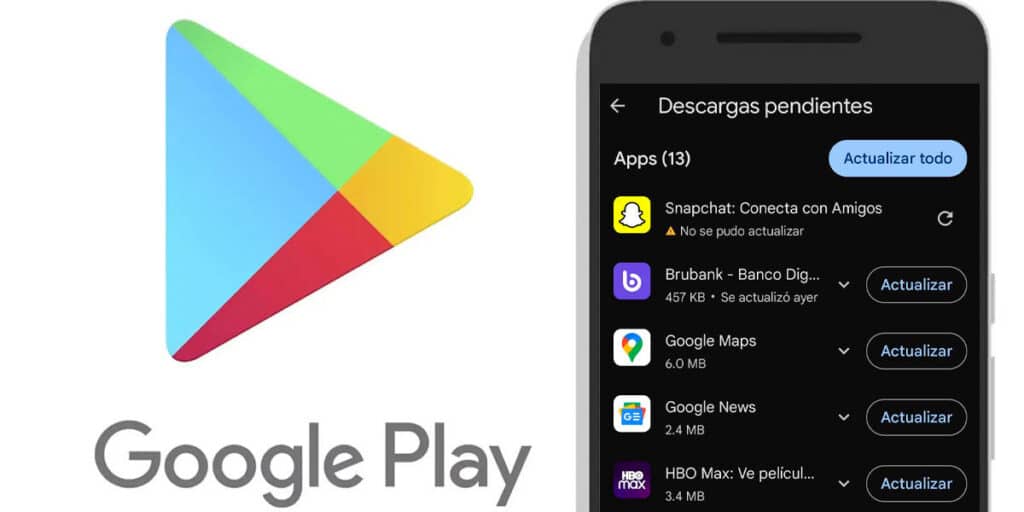
The main reason for this is the accumulation of events that Google Play Store stores in the device’s memory. When it is unable to update an app, it usually shows the message “Unable to update” or sometimes it may indicate a download pending message.
Fortunately, solving this problem on Android is very easy. You don’t need to uninstall the app that cannot be updated or factory reset the mobile. You can get rid of this error message in seconds by following the steps we show you here.
How to fix “Unable to update” error in Google Play Store
Before following the tutorial in question, it’s important to make sure your internet connection is fine. To do this, you need to measure your WiFi or mobile data speed. If everything is fine, the appearance of this message is related to the Play Store.

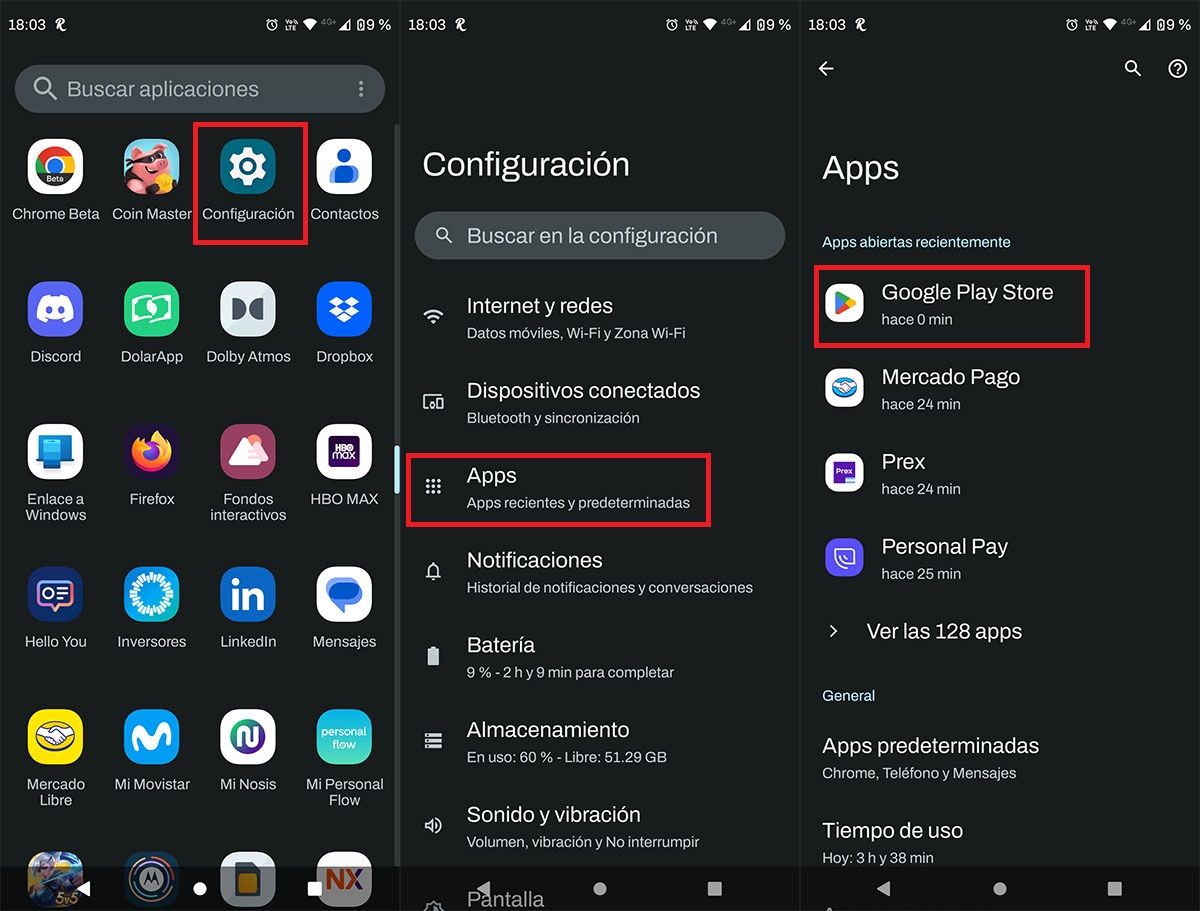
First, you need to access the settings of your Android phone. You should click on the “Applications” section in your terminal settings. For this reason, you need to enter the Google Play Store icon (if the app is not visible, you must enter it in the menu where all the applications you have installed are displayed).

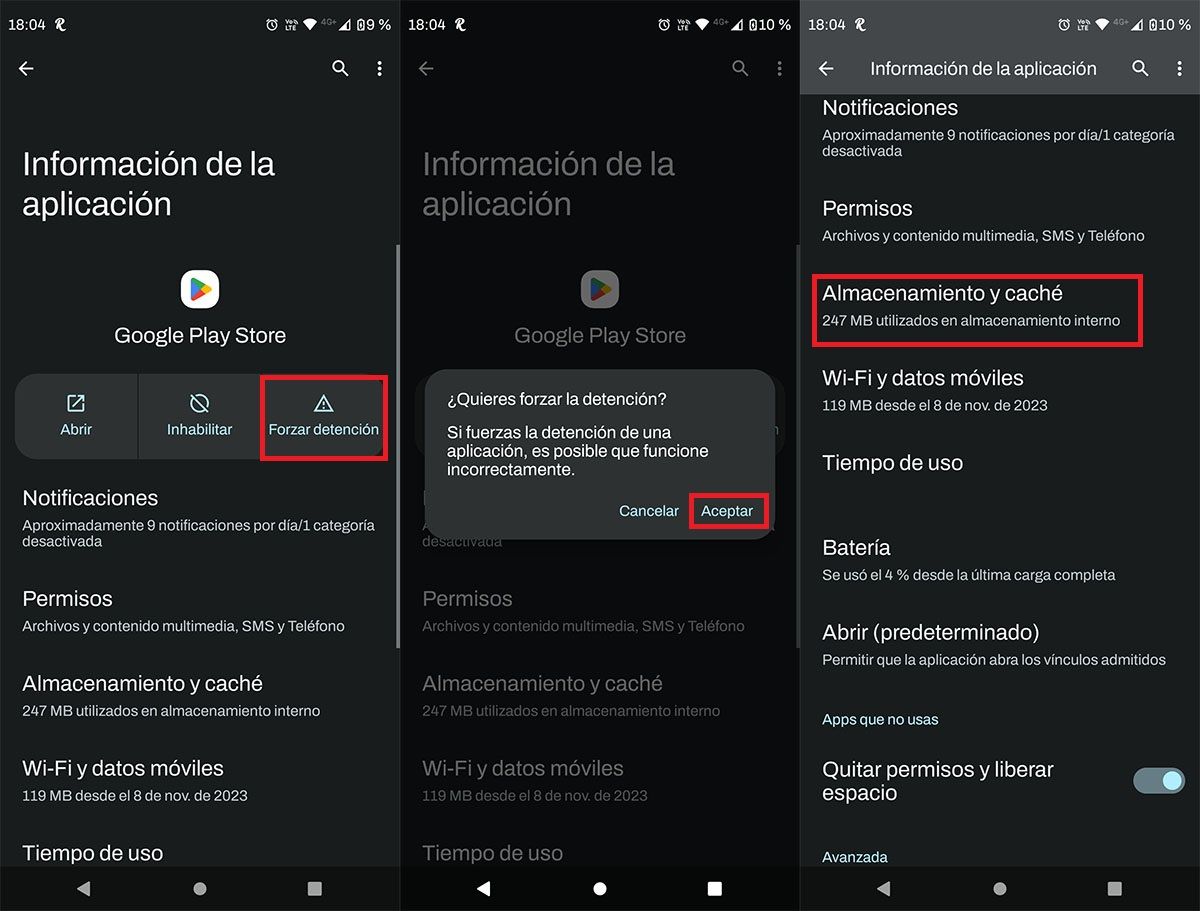
After that you need to click on “Force stop”. A window will appear with two options, click “OK” to restart the Play Store. Once the app restarts, you need to click on “Storage and Cache”.

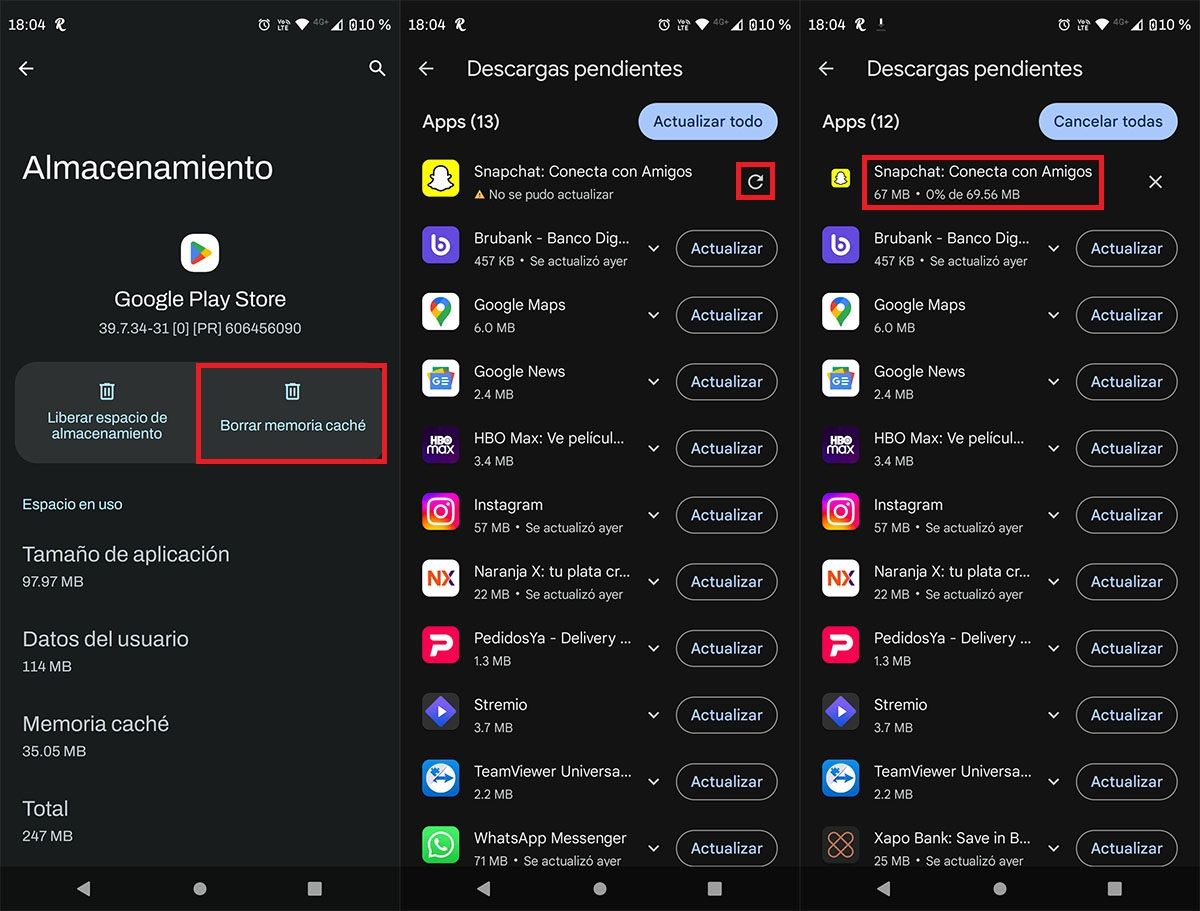
Click the “Clear Cache” button. Open the Play Store again and find the “Unable to update” app. Once found, click on the icon that appears to the right of the app. Within seconds, Google Play Store will update the app and remove the error message in question.
If the problem persists and you are unable to update a particular app, you should restart the mobile device and repeat all the steps we show you in the tutorial.


